Tuesday, July 20, 2010

What My Students are Watching


Another beautiful week in Idyllwild, and that means another video for you all to watch. This video is just so much fun! We show this clip in animation class after working on walk and run cycles, which are tricky but essential in character development. These bunnies have a run cycle as well, with each position represented by a different model. This is discussed in the “Making Of” segment of the video. They also talk about designing the characters (bunnies) before ever animating them. In our class, we strongly encourage the students to model their characters and their movements, because a well-executed animation depends on this solid foundation.

We're having a great class this year. There are only six students, and they are thriving under our less-diluted attention. Their work is wonderful! There's a crying banana that just makes me want to rip my heart out and a trampoline in another clip that looks too fun to not be real. I hope I can figure out some way to post a few examples online.

Wednesday, July 14, 2010

How to Do Stuff: Cooking Lavender Creme Brulee

This is part 3 in (what has become) my occasional series, "How to do Stuff," (part 1 being "How to Spend a Year in Australia" and part 2 being "How to Replace a Broken Car Window"). Today's installment: Lavender Creme Brulee!

I got to taste this astoundingly delicious concoction at a friend's wedding in June, and when the opportunity arose a couple of weeks ago to actually make creme brulee (my first time), I insisted that it be with lavender, just for kicks. Here's what you need:

  • Just over 1 quart of heavy whipping cream (40% if you can get it)
  • The yolks of 6 eggs, at room temperature
  • 1 cup of sugar
  • 1 packet of vanilla sugar
  • A whole mess of lavender (I had a mixing bowl full of it)
Step 1: Soak the lavender in the cream for a couple hours, at room temperature. This step is done to taste, but remember that the baking process will further enhance the flavor. Once you can taste the lavender in the cream, you're good. I helped the process along by squishing up the lavender a bit with a potato masher, because I was worried there wouldn't be enough flavor. The bonus I got for my squishing efforts was the little pieces of lavender floating in the cream afterwards, which was just adorable, so I left them in.


Step 2: Separate the yolks from 6 eggs, again at room temperature. There is no picture of this. This was my first time separating eggs, so it was a little scary. My word of advice: be careful not the let the yolk get punctured by the sharp edges of the shell. Don't get too happy with the flipping back and forth, this will lead to yolk breakage. Ack!


Step 3: Cream the yolks and all the sugar in a mixing bowl. Use and electric mixer and blend and blend and blend. Do this until you can't see the individual grains of sugar any more. It will take more than 10 minutes, so be patient. The result will be super-fluffy and you will be pleased.

Step 4: Bring the lavender-infused cream to a boil, remove from heat, and let sit for 15 minutes. Doesn't "lavender-infused cream" just sound romantic and delicious? I feel like I work at some upscale restaurant, even though this all happened in my friend's kitchen.

Step 5: Combine the cream and eggs/sugar mixture slowly. Be sure to do this a little at a time while constantly stirring. We don't want the cream (which is still pretty warm) to cook the eggs at all, so it's important to keep the stuff moving.

Step 6: Fill your ramekins nearly to the top. This recipe filled up eight of these, which are about a pint each. So cute!

Step 7: Place the ramekins in a roasting pan filled with enough water to go halfway up the sides of the ramekins. This step allows the creme to bake evenly and not scorch on the edges.

Step 8: Bake for ~45 minutes, or until the cream is set, but still trembling in the middle.

Step 9: Remove from oven and chill in the fridge ~2 hours. This step is done when the custard at the center of the dishes is firm to the touch, but has about as much give as the flesh on the underside of your arm.


Step 10: Sprinkle each ramekin with a light dusting of sugar (baking sugar works best) and melt it with a torch. This step can be repeated if you like a really thick brulee crust (like I do!). I used raw cane sugar for this step, which tended to burn before it even melted. It smelled like marshmallows.

Step 11: Enjoy! You're ready to eat as soon as the melted sugar on top hardens. Break out your teaspoon and get cracking! Ahh, this reminds me of one of my favorite movies: Amelie.

My taste-testers said they found the lavender flavor too strong, though I liked it. Evidently, lavender is a mild anesthetic, and eventually it will numb your taste-buds. The first bite is still fantastic, though! I will infuse the cream a little less next time. My next attempt at flavor-infused creme brulee will be with roses, which sounds exciting. I'd also like to try clove and lemon.


Tuesday, July 13, 2010

What My Students Are Watching


I'm here in Idyllwild for the summer teaching computer animation to high-schoolers. My co-teacher and I like to show the kids animated clips to inspire them and as examples of how to employ the techniques we're teaching them. Over the course of the next few weeks, I'll post these here, too, so you can all enjoy them. We try to find fun, accessible stuff they'll enjoy. Today's installment is the first video we showed: "Robot Chicken Star Wars: George Lucas at the Convention." Though apparently crude, the folks who worked on this know what they're doing, and they have employed a barrage of classical animating techniques in a pretty sophisticated way. Watch the way George pulls back before dashing into his run. So Looney Tunes! More in a few days. Happy watching!

Wednesday, June 9, 2010

In The Place of the Family Ghosts

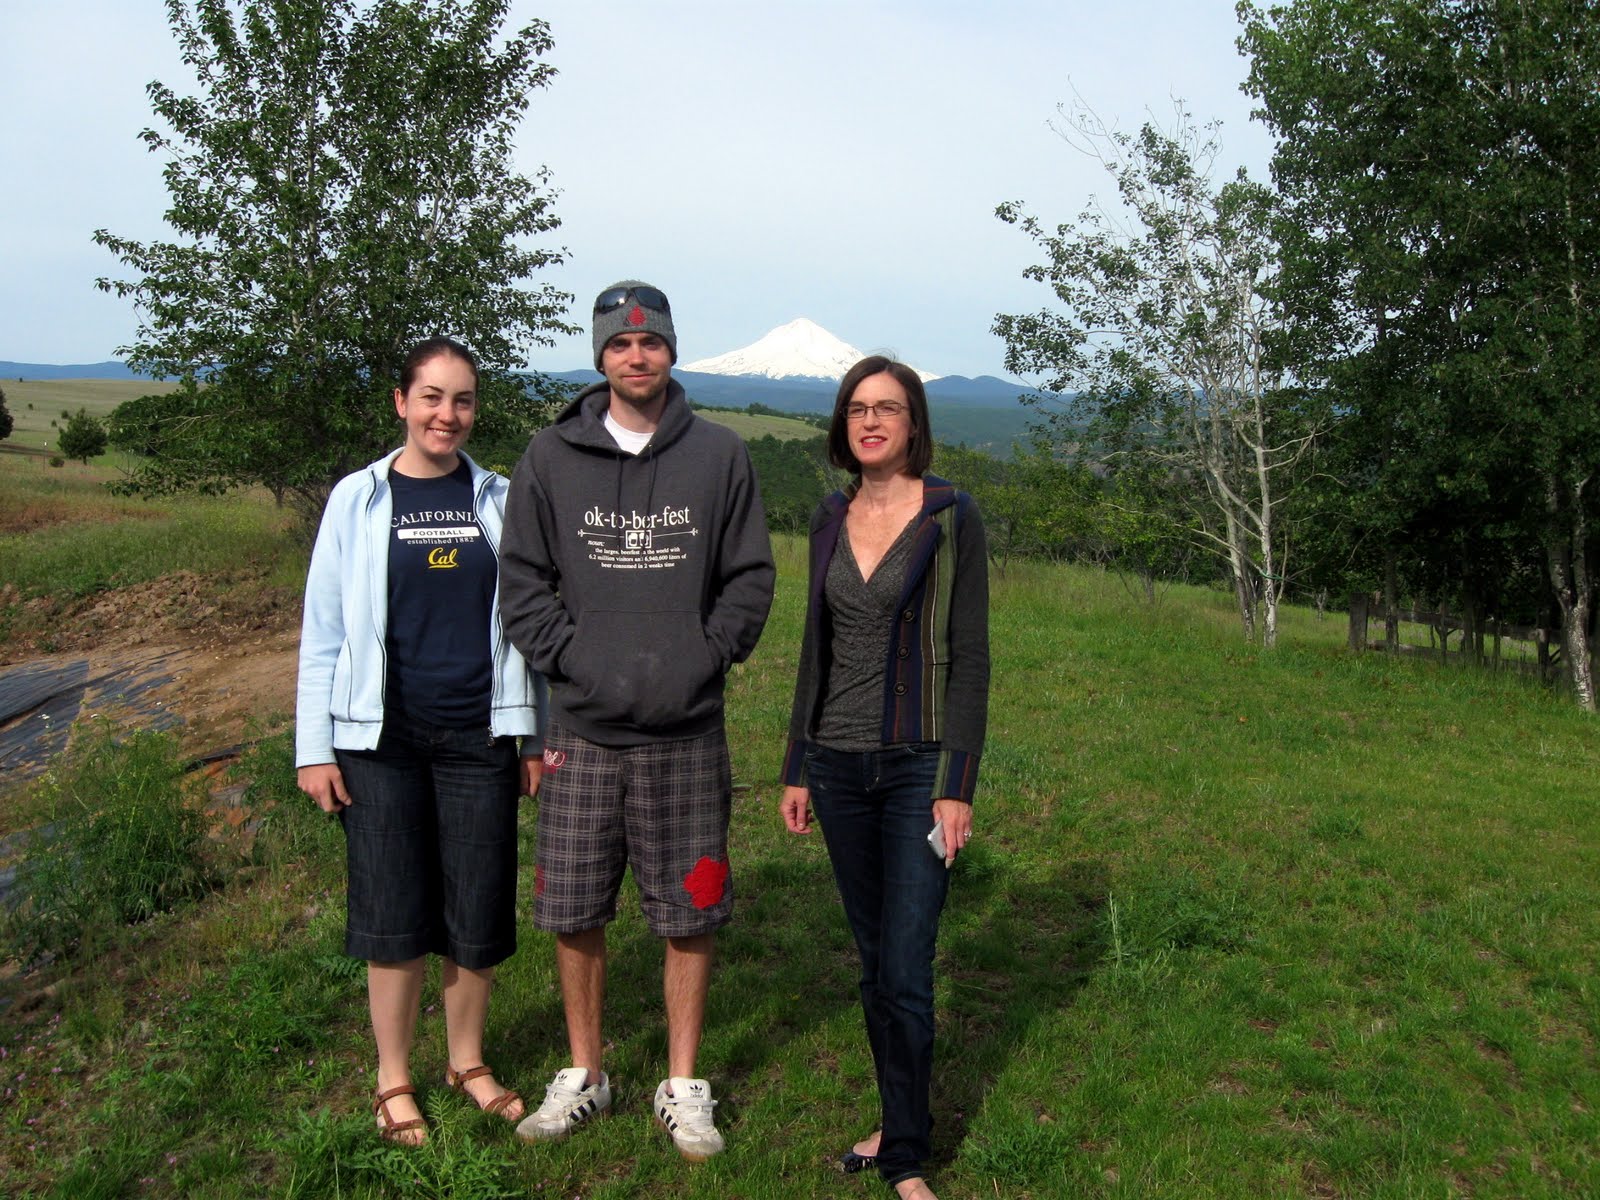
Mt. Hood as seen from "The Ridge"

Sometime during college I heard a statistic regarding the provenance of the various undergraduates at UC Berkeley with me. Inevitably, I will misquote the exact figure, but let's say that something over %50 of the students there had at least one parent born outside the United States. While this great melting pot/tapestry of a society we live in is both made more beautiful and strong by this fact, it actually puts me in this very boring-sounding minority: both my parents, in fact, all of my grandparents, were born in this country. And even when we do trace my roots back to Europe, I come from decidedly white stock: England, Ireland, Norway. Incredibly, this has given me a bit of an inferiority complex. I can't talk about learning recipes from the far-away country where my grandmother grew up (unless you count Nebraska), and my heritage doesn't include any stories about the "old country" as it were. Maybe it's because I live in California, the melting-est melting pot of them all, but it makes me decidedly weird to be able to say this: not only were all of my great-grandparents born in this country, but most of my great-great grandparents were as well! (I think one or two may have been from Canada, but I'm not sure at this point when the "Canadian line" met up with the American side).

Years ago I decided to start thinking about this as the cool fact it is, rather than something to be ashamed of. And, it is definitely a privilege to also have access to names, photographs, and even biographical information of ancestors of mine going back six or more generations. My great-great-great grandparents on my father's side were Remembrance and Katherine. What names! On my mother's side, my uncle has traced our family back to the Revolutionary War, when two brothers, William and Robert, were on opposite sides. William was a loyalist, and eventually fled to Canada, where his descendants stayed for a while. He is the brother I'm descended from. A loyalist to the crown!

Slightly more recently, a young Norwegian man named Lewis Anderson was pretty much kidnapped by his sisters and brought to live in north-central Oregon. He met a girl named Carrie, and together they built a homestead in a place called Pleasant Ridge and raised four children: Oscar, Lambert, Mabel and another girl whose name starts with E. Mabel is my great-grandmother. She married Samuel Meeker and their children were Helen, Doris and Earl. Earl married Mary Alice and they are my grandparents. All of this happened up on Pleasant Ridge, surrounded by scrub oak woods and wheat fields. This past weekend, I had a chance to see where I came from. And, looked at the right way, it's as amazing as anything else.


The "A-Frame" and in the distance, a barn

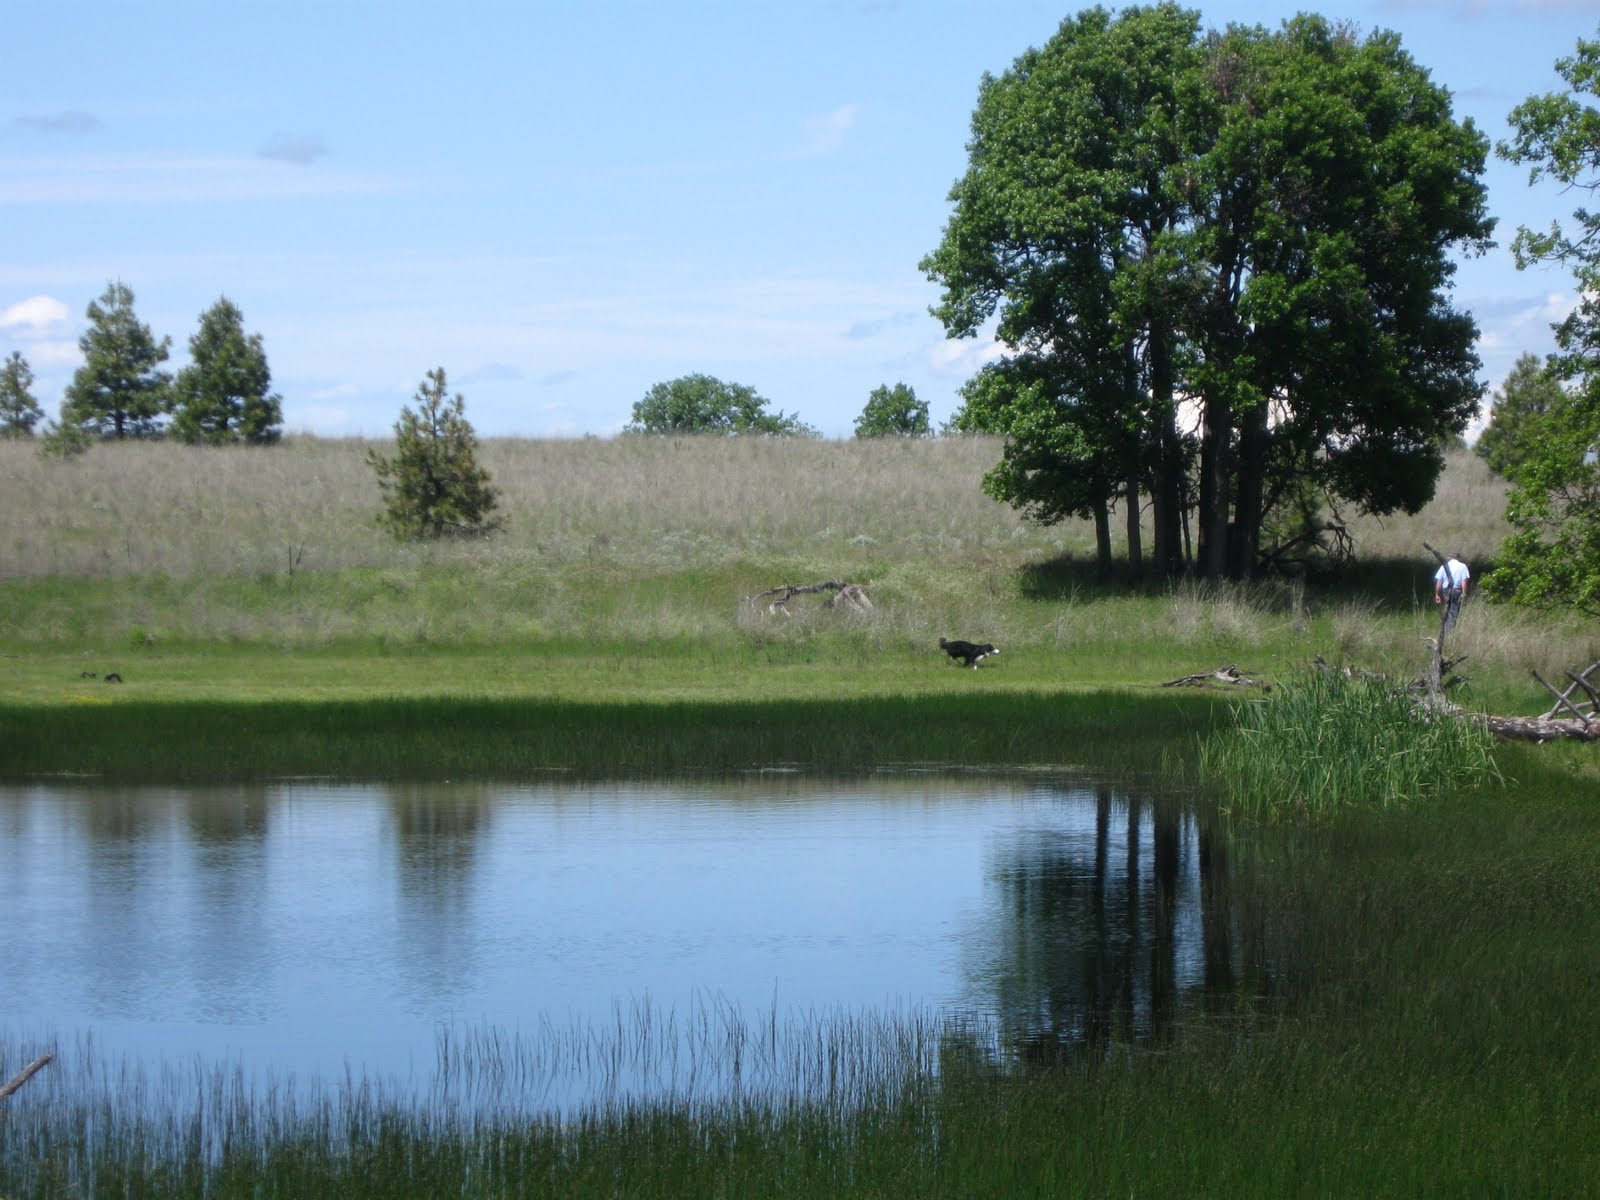
Lang's Pond


The diversity of flora on Pleasant Ridge

At the Anderson Homestead

Of course, the very most wonderful fact about this whole story is that Lewis and Carrie Anderson (again, my great-great-grandparents) built a homestead on Pleasant Ridge. There was nothing there but pine trees and views of the mountains, but like all those folks you hear about on the Oregon Trail, they built a life from almost nothing. Besides their house, they had a barn, a granary, various sheds (to my left in the picture), a root cellar and a blacksmith's forge. They cleared their land, farmed it, raised four children, and set events in motion that lead directly to me typing this today.

Anderson Homestead, pond in the distance

The best part of my visit was visiting this old piece of land, which has belonged to my family for over 120 years (the construction date on their house says 1895, but I know they lived there for 5 years before it was built).

Lambert Anderson's House

Lambert's house is reached via "Library Road" going southeast-ish from the original homestead. It's still standing, but that could change any time now. Inside, one can still find remnants of carpet, linoleum and their window coverings. It's like archaeology! Lambert would be my great-great uncle, so I am not his direct descendant. Lambert's wife, Edith, kept lots of books, and the children on the Ridge would walk to her house to borrow them, so she was the local librarian of sorts, and that's how "Library Road" got its name.

Lambert's Barn


Lambert's Barn

View of Mt. Hood from Lambert's Home

So here I am, exploring the land my family has owned continuously for five generations. We were treading paths followed by the childish feet of my own grandfather, who is long ago passed. The land was farmed by my great-aunts and uncles. They saw these gorgeous views, which have not been (nor, I hope, ever will be) obscured by modern buildings and highways. They breathed this air. And, looking out on all this, I could feel that there were ghosts there. They weren't mean or scary ghosts; they weren't even the kind of ghosts that try to influence the physical world. But they were there. The air around me was pregnant with history and memory. There was a kind of vibration, an energy, just outside my ability to feel it, reminding me that this is where I come from. This is my heritage. This land. The people who poured their whole lives into it that their children and children's children might go on to live and thrive and produce me.


Anderson House (built 1895)

Here's the house that Lewis and Carrie Anderson built. My grandfather donated it to the city of The Dalles as a permanent museum (to avoid its being burned down in a grass fire). Most of the inside is decorated based on educated guesses and some help from my great-aunts when they were still living. However, the spinning wheel inside did belong to my great-great grandmother, Carrie, which I find just splendid.

Tearing Down the Duck Blind

Since the land is still farmed, some real work must still be done. The trip involved a great deal of reconnaissance of the hundreds of acres of property, checking on wheat crops, trees stands that my uncle hopes to harvest for timber, and dealing with the consequences of hunting (see photo above). This structure is built next to a pond so "hunters" can shoot elk and deer from the trees when they come to drink. Not very sporting! My brother tore it down using mostly a pry-bar and his biceps.

Cousins, descendants of the wheat farmers (six others not pictured)

Mine is the first generation of my family since before the turn of the century to not grow up farming wheat on Pleasant Ridge, near The Dalles, OR. As a child, I heard stories from my mother about driving the hay trucks and being out next to her dad riding on the combines. Though the land is still farmed, my mom and uncle lease it to someone else and get a part of the profits from the sale of wheat or barley.

I stand to inherit part of this land some day. I have a lot of choices about what I can do with it. My cousin has some land, but she doesn't farm it and instead gets a little money from the government to do nothing with it and allow it to go back to its natural state (pine forest). I could build a house on it, but not a farm. I won't pretend that I could somehow manage a fully functional, self-contained farm. Or, like my mom and uncle, I could lease the land to someone to grow wheat. At the very least, I would love to continue the tradition of having this land to come back to. The memory and knowledge of the place are only kept alive as long as we have interest in them, and I don't intend to squander the remarkable gift of history my ancestors have left me.

Monday, May 31, 2010

Excursions in Car Repair: Day 2

I successfully replaced my car window! I'm not going to pretend it was easy, but from start to finish the whole thing only took an hour. Take heart everyone! If your windows aren't automatic, you too can replace them if they break.

Step 1: Remove the door panel. Most of the panel just snaps off around the edges. There is one screw to be removed which holds the interior door handle in place. The door handle is also attached to a metal bar that actually controls the latch mechanism, so it has to be gently eased off. The window roller is the most difficult thing to remove. It fits over a smaller knob and is secured a piece of metal sort of like a paper clip. (Listen to that! I don't know ANY of the real terms for these things! It all sounds so vague and non-descript.) The window knob is just jimmied off with a flathead screwdriver by pushing on the "paper clip" until it releases.

Detached Door Panel

Step 1a: Remove all glass shards from the door frame. There were still a lot of glass fragments along the frame creases where the window had been and in the tracks the housing runs along. The bottom well of the door interior is also full of glass shards, but I had to leave those, because I didn't have a shop vac.

Step Two: Expose and remove door innards to reach window housing. The interior of the door is sealed with a sheet of plastic and this black, gummy stuff. This part is just pulled off. On the bottom right of the door, there's a polygonal piece of metal (which appears to serve to direct function) which has to be detached. Once this is done, you can see the track and housing for the window.

Door Innards

Here are two close-ups of the window housing itself. The screws fit into two holes at the bottom of the window glass. On the right side of picture (a) you can see the track that the housing moves on as the window is raised and lowered. In picture (b) you can see the cable that the rolling mechanism is actually winding when the window is raised. The screw in picture (a) was very tightly attached, and I ended up needing pliers to loosen it first. My little Phillips head was not offering enough torque.

Window Housing (a)


Window Housing (b)

Step 3: Clean the new window glass. My piece of glass was filthy from its time spent in the salvage yard. I didn't think to take a picture of the glass before it went into the door, though.

Step 4: Insert glass into door. I started this step with the housing rolled all the way up, thinking it would be easiest to line the holes up this way. It turns out that the dimensions of the glass and window frame don't really allow this, so after about five minutes I realized it would be easier if the window was rolled all the way down. This allowed me to gently lower the glass into the door and settle it into the housing. The glass is just the perfect width, so it doesn't really take a lot of effort to get the bottom centered properly with the screws. The glass very naturally wanted to slide into the side tracks, and a few gentle-but-firm pushes lined the screw-holes up perfectly. Putting one screw in helped, too. At the bottom of the picture (d) below, you can see where the window has been fitted into the housing.

Newly Installed Glass (c)


Newly Installed Glass (d)

Step 5: Reattach door panel. This was just a matter of doing everything in reverse. The plastic covering of the innards stuck right back onto the gummy black stuff, and I think I reattached the window roller properly. It hasn't fallen off yet! There were a couple of non-essential pieces I left off, and they're still waiting in my cup holder. Since I will have to remove the door panel again when I finally vacuum out all the glass inside, I will put those piece back on then. Here's the finished work, good as new:

Justify Full
Finished Door with Window and Panel

And there you have it! Do not be intimidated. All you need to affect this repair for yourself are Phillips and flathead screwdrivers, maybe some pliers, and a little bit of moxie. I am proud that it cost me less than $20 ($17.42 for the glass plus $2.00 for admission to the salvage yard) and an hour of my time to get this done. Not only is it inexpensive, but it was very enlightening and empowering. Not very messy, either! The other victims of the burglar paid $150 or more for this repair, but here I am, out less than 20 bucks plus with the added knowledge of how a car window works. I am delighted.

Peace, folks!

Friday, May 28, 2010

Excursions in Car Repair: Day 1

Last Sunday night, some stoned-ass punk broke into my car. This person also broke into three other cars in my apartment complex, breaking one window in each car and basically taking whatever he could reach with one hand through shattered glass. From me, he took the GPS out of the glove compartment. From one lady, he took her Bible, which was easily confused with a purse in its nice carrying case. From another car, he took a GPS and left a perfectly nice, expensive laptop sitting on the back seat. We're all very lucky that this guy was clearly clueless, and probably inebriated.

At any rate, I was left without a front passenger window. Monday afternoon when I went to my car, I found a gaping hole in the glass and shards all over the front seats and floor. Fortunately, this is the only damage to the car. A quick phone consultation to my dad and I knew what I had to do: get a new piece of glass and put it in the door. Finances being what they are now, this would have to be done myself, but as it's a wholly mechanical repair, I can manage it. However, the nice weekend we just had was followed by a straight week of rain, and I didn't have a day pleasant enough to do open-air auto repair until today.

Today, I went out to the Pick-N-Pull in Rocklin to find a front passenger window for a 2000 Ford Escort sedan. This is a wholly new experience for me. First of all, they charge admission ($2), like at a county fair. They told me the car I wanted was on their lot, but made no guarantees that the part I wanted was there. They gave me a list of the cars currently on the lot that have a part that would fit mine and sent me on my way. Then I had to go wandering around the Ford section looking for an Escort. The first one I saw had the roof completely caved in, so no windows. A few rows along toward the back, I saw a nice red Escort, a 1999, which was perfect, and it had an intact front passenger window.

Did I mention that you're supposed to bring your own tools to a Pick-N-Pull? I didn't figure this out until I was there, a half hour from home, and had paid admission. So I get the door of the car open and I set about trying to pry the door panel off so I can reach the window attachments. I might have succeeded if I hadn't tried to be gentle about it. Most of the work was already done before I got there, but I wouldn't have gotten my part today except for a pair of nice men who walked by looking for a T-bird (or maybe a Mustang?). The up-down knob had to be removed and a few more screws had to be taken out. If I had just brought flathead and Phillips screwdrivers, I would have been fine. Oh well, one of them was kind enough to disassemble the door panel for me so we could see the window.

The glass slides up and down tracks on either side. It is held in place in a housing at the bottom with two more screws. The trickiest part of the repair was getting the door panel itself off, actually. A few more minor pieces obscured the view of the glass, and these were removed with simple unscrewing as well. After that, the window just slid right out the top. It's not even that heavy. So, after leaving the door panel and screws sitting inside the car (no need to reassemble, though I could have used the practice), I marched my new window up to the payment trailer. They were having a half-price sale, so it came to $17.42 (Looks like I picked the right week to have my car burglarized!).

Tomorrow: Day 2 - Putting a new window in my car. Pearl's gonna be so pretty!

Wednesday, May 26, 2010

So You Wanna Spend a Year in Australia?

The subheading for my blog says it's about "Facebook purging and unemployment," but up to now I haven't bothered to address the second element of that conjunction. So, what's up on that front?

My tutoring job is about to run its course for the school year. Then there's Idyllwild for July, and after that...silence. I have nothing planned and nowhere to go. Though frightening, it leaves all possibilities open, so I have chosen one.

I'm formulating a plan to move to Australia at the end of this summer. I like it in Australia, and I have family there, so I'd like to see if I like living there. My previous two-week vacation does not give the most accurate impression of a country in terms of lifestyle. Now, if you know me, you know I am very resilient, adaptable and adventurous, and could probably survive and thrive anywhere, but, only fools rush in. So, I want to spend the better part of the coming year in Australia on a "working holiday" visa to see if living and working there is something I can see myself doing permanently (or at least semi-permanently). I want to see if conditions are better for daily life there. They have universal health care. They have a good social safety net. They need teachers! If I like it, I might just end up going back for good. But, first things first: I need that visa.

Though designed to be simple, it still requires some pretty involved logistics and financial contortions. This is probably because they would rather I "holiday" more than I "work," so I spend some of my touristy moolah there. Not to mention, this visa is clearly intended for people younger than me who aren't quite so established (me? established? Ha!) Just to get the visa I will be required to:

Apply and pay a non-refundable fee of $190 US.
Possibly undergo a medical examination, which I would also pay for
Take out health insurance, because I'm a #$%&! American, so of course I don't have any!
Accumulate $4100 US in my bank account (based on today's exchange rate)

Before leaving for Australia, I need to get a lot of my own ducks in a row:

~$900 for a plane ticket!
~$1000 in traveler's checks to tide me over before I get a job
~$700 in my bank account to cover automatic payments for my student loan
~$700 in my bank account to cover rent for a storage unit
Register my car as PNO
Inform my bank of my plans so they don't cancel my debit card if it's used there
Cancel all my subscriptions and my cell phone
Get a voltage converter that works (I miss my hair dryer!)
Possibly buy a new computer...

Once in Oz, I also have to do the following:

Set up a bank account
Get a TFN (like SSN, but Australian)
Find a JOB.

A major force driving this plan is that I can probably find work more easily there than I can anywhere in California (excluding my folks' in the desert, where...gah!). Getting to know my cousins better and having the experience of living there are tied for a very close second.

This list will be updated as I learn more about this confusing process. I relish the challenge!